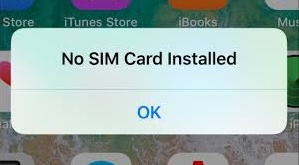
With our iPhones being such a vital part of our everyday lives, any minor glitch can cause significant stress and inconvenience. A common problem that users frequently encounter is ‘No Sim Available’. This blog will guide you through some simple yet effective ways to troubleshoot this problem and ensure your iPhone runs smoothly.
Understanding ‘No Sim’ Issue on iPhones
The ‘No Sim Available’ notification on your iPhone is more than just a mere message; it’s a cry for help from your device. But what does it mean? Essentially, it’s your iPhone’s way of telling you it’s unable to detect a SIM card in its designated slot. But why does it happen?
A multitude of reasons, really. It could be due to a misaligned SIM card, a faulty SIM, or maybe some software gremlins wreaking havoc. There are also times when it’s more of a hardware issue, like a faulty SIM tray or internal connections. By grasping the roots of this error, you’re already one step closer to a solution. Stay tuned as we delve into practical fixes to combat the ‘No Sim’ error in subsequent sections of this blog post.

Reinserting the SIM Card Properly
Imagine your SIM card as a delicate key that needs to perfectly fit into the unique lock that is your iPhone. A slight misalignment could prevent the phone from recognizing it, resulting in the ‘No SIM’ error. But worry not, this predicament can easily be rectified. Let’s take it step by step.
First, you’ll need the right tool to remove the SIM card from your iPhone. Typically, iPhones come with a small SIM card removal tool. If you can’t find it, don’t fret! A small paper clip will do the trick too.
Next, locate the SIM card tray on your iPhone. Depending on your model, it could be on the right or left side. You’ll see a tiny hole – this is where the tool comes in. Gently push the tool into the hole and the tray will pop out.
Here comes the important part – carefully examine the SIM card. Is it aligned properly? If it seems askew, adjust it so that it fits snugly in the tray.
Now, you’re ready to slide the tray back into the phone. Do this slowly, ensuring that the SIM card doesn’t move out of place. And voila, you’ve successfully reinserted your SIM card!
Don’t rush through the process; be patient and meticulous. After you’ve put everything back in place, give your iPhone a few moments to acknowledge the SIM card. If the ‘No SIM Available’ error doesn’t show up, congratulations, you’ve solved the issue. If not, keep reading for further troubleshooting steps.
Trying Out a New SIM Card
If the ‘No SIM Available’ error continues to plague your screen even after a careful reinsertion, it might be time to cast a doubtful glance at the SIM card itself. At times, the issue could very well be the tiny, seemingly innocuous chip. If that’s the case, it’s time to test your iPhone with a new SIM card. This approach is beneficial as it serves to rule out any problem areas. Are we dealing with a faulty SIM or is the iPhone’s hardware to blame?
Getting a new SIM card is quite straightforward – simply reach out to your carrier and request one. Once you have the new SIM in hand, repeat the process of careful insertion that we’ve discussed in the previous section. If your iPhone springs back to life, free from the clutches of the ‘No SIM’ error, it’s evident that the former SIM card was indeed the culprit. On the other hand, if your iPhone still displays the dreaded ‘No SIM’ error, it’s a clear indication that there might be an issue with the iPhone’s hardware. Don’t fret, there are still a few more solutions to try before considering professional help. Stick around as we navigate through them together.
Considering eSIM if Your Carrier Supports It
Technology never ceases to amaze, does it? If you’re using an iPhone XS or a model released after it, here’s a modern solution to your ‘No SIM Available’ issue – the eSIM! Electronic SIM or eSIM is a futuristic and innovative feature that Apple introduced to provide a hassle-free experience to its users. Essentially, it’s a virtual SIM that eliminates the need for a physical one, thus also doing away with any potential SIM-related issues. With eSIM, you can activate a cellular plan digitally, sans a physical chip. Sounds promising, doesn’t it?
However, do bear in mind that this feature isn’t universally supported yet. Only specific carriers offer this service. Thus, before you dive into the eSIM pool, it’s crucial to first confirm if your carrier is on board. Give them a call or visit their website to verify this. If your carrier supports it, you can switch to eSIM and say a likely goodbye to the annoying ‘No SIM’ error! If not, hang in there! We still have more fixes in our arsenal to address your issue. Stay with us as we delve deeper into potential solutions in the subsequent sections of this blog post.
Dealing with Persistent ‘No Sim’ Errors Like iPhone 7 No Sim Issue
Even after performing the mentioned steps, if the pesky error continues to haunt your iPhone, it may be hinting at deeper, persistent issues. Certain iPhone models, such as the iPhone 7, have been notorious for such stubborn errors. Fear not, we still have a couple of potential solutions up our sleeves!
Try resetting your network settings first. This action will erase all current network settings, including your saved Wi-Fi networks and passwords, cellular settings, and VPN and APN settings. It’s akin to giving your iPhone a fresh start in the realm of network connections.
To reset, navigate to ‘Settings’ on your iPhone, then tap ‘General’. Scroll down, select ‘Reset’, then tap ‘Reset Network Settings’. You’ll need to enter your passcode and then confirm your decision. Your iPhone will then restart with default network settings.
If the problem still lurks around, check if your iPhone’s iOS software is up-to-date. Outdated software can sometimes give rise to unanticipated errors. You can update your iPhone by going to ‘Settings’, then ‘General’, and finally, ‘Software Update’.
If none of these solutions work and the ‘No SIM’ error still persists, it’s time to seek professional help. It might indicate a hardware problem that needs expert intervention. Reach out to Apple Support or a trustworthy iPhone repair service. Remember, no problem is too big to be solved with the right resources and assistance!
Preventive Measures to Avoid Future ‘No Sim Available’ Issues
While troubleshooting the ‘No Sim’ issue is crucial, it’s even better if we can prevent it from cropping up in the first place. So, how can you ensure that your iPhone stays free from such woes? Here’s a handy list of preventive measures.
Firstly, never underestimate the power of timely updates. Regularly updating your iPhone’s software can keep a myriad of issues at bay, including the ‘No Sim Available’ error. Navigate to ‘Settings’, tap ‘General’, and finally, select ‘Software Update’ to ensure you’re not missing out on any important updates.
Keeping your SIM card and its tray clean is another crucial preventive step. Why so? Any accumulation of dirt or debris can hinder the connection between your SIM card and your iPhone, causing detection problems. Hence, make it a habit to clean them gently yet thoroughly using a soft, lint-free cloth.
Lastly, treat your iPhone like the valuable possession it is. Avoid subjecting it to physical stress, be it sudden drops or rough handling. Also, keep your iPhone at a safe distance from water or high humidity, as such conditions can wreak havoc on its internal hardware.
Remember, a stitch in time saves nine. By proactively adhering to these preventive measures, you can ensure that your iPhone remains in optimum health, free from issues.


